
Hospitals operate virtually 24 hours a day. Over time, flooring systems can deteriorate—developing worn seams, surface cracks, or areas that can no longer be thoroughly cleaned and disinfected—which creates both safety hazards and risks to infection control.
However, hospitals cannot simply shut down entire departments or floors to facilitate flooring renovations. This raises critical questions:
How can flooring be replaced while maintaining essential hospital services? How should renovation zones and construction schedules be planned? And how can contractors minimize disruption to hospital operations, mitigate safety risks, and avoid unforeseen costs? In this guide, we detail a rigorous, clinically-focused approach to hospital flooring renovation.
1. When Should Hospital Flooring Be Replaced?
Deciding between “partial repair” and “complete replacement” requires evaluating the extent of the damage, the condition of the subfloor, and the long-term operational value. Replacing flooring too early wastes capital, while delaying necessary replacement fails to meet standards and hinders facility use.
Signs That Hospital Flooring Needs Replacement
Recurring cracks or damage at the seams, which trap dirt and make thorough cleaning difficult.
Cracks, curling, blistering, or loose sections that pose a tripping hazard to medical staff and patients. Persistent damage that cannot be fully resolved through repairs (i.e., the problem keeps recurring).
Surface aging or damage that interferes with disinfection protocols or impedes the safe movement of wheeled equipment.
Repair costs that continue to accumulate over a 12- to 24-month period, accompanied by an increasing need for maintenance.
| Approach | Best For | Limitations |
|---|---|---|
| Spot repair | Isolated damage, intact subfloor, low-traffic back-of-house areas | Does not address widespread wear or underlying root causes |
| Single-area replacement | Damaged sections in one department, consistent subfloor condition | May create visual or performance mismatch with adjacent flooring |
| Full wing/floor renovation | Widespread deterioration, end-of-service-life material, planned subfloor upgrades | Highest upfront cost and operational coordination requirement |
Important: Visible flooring damage is often a symptom of deeper issues such as subfloor moisture, adhesive failure, or improper original installation. Always identify and resolve the root cause before installing new surface material, or the same problems will reoccur prematurely.
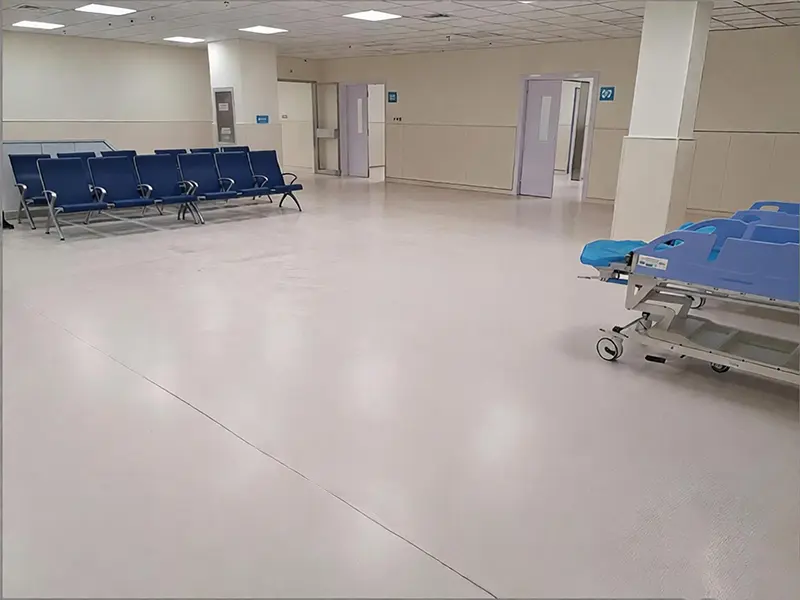
2. Pre-Renovation Assessment of Hospital Areas
Define the function of each area
Patient wards and inpatient units: Require minimal noise disruption, strict infection control, and 24/7 access.
Hospital corridors and circulation paths: Construction must be phased to ensure at least one unobstructed passage remains available.
Outpatient departments and waiting areas: Construction can be phased during the day to ensure patient care remains uninterrupted.
Treatment and diagnostic areas: Construction requires strict control over vibration and dust.
Operating rooms and other specialized clinical spaces: Subject to the most stringent requirements regarding air quality, sterile environments, and access control. All construction in these areas must adhere to protocols established by the hospital’s infection prevention team, facilities management department, and clinical leadership.
Inspect existing flooring and subfloors
Assess existing flooring materials and their overall condition, including the integrity of seams and signs of wear.
Evaluate the subfloor for flatness, structural damage, and moisture content.
Identify any residual adhesive and determine the requirements for its removal.
Examine existing thresholds, clearances beneath doors, and fixed equipment that cannot be relocated.
Identify floor transition zones and adjacent completed areas that require special protection during construction.
Plan circulation routes and restricted construction zones
Develop a detailed site plan, clearly marking patient pathways, emergency evacuation routes, staff circulation paths, routes for transporting heavy equipment, and temporary containment zones.
3. Phased Flooring Renovation
Divide large-scale renovation projects into distinct work zones. For each zone, clearly define construction boundaries, establish dedicated temporary access routes, and set explicit handover criteria. Each zone should function as an enclosed construction unit, complete with appropriate containment measures, dust control protocols, and waste removal plans.
Determine an Appropriate Construction Sequence
The construction sequence should be determined based on departmental functions, patient flow, connectivity between areas, and construction logistics. It is advisable to begin in lower-risk areas with less foot traffic, avoiding the simultaneous closure of entire corridors or departments.
Coordinate with Hospital Staff
Before the start of each construction phase, hold a kickoff meeting to clarify construction schedules, access routes, noise restrictions, and emergency response plans. Use daily or shift-change briefings to keep clinical staff informed of construction progress, thereby minimizing disruptions to patient care caused by poor communication.
Establish Clear Handover Criteria
1. Site Preparation: Install containment barriers and designate approved temporary access routes.
2. Flooring Removal: Remove existing flooring materials and clear construction debris, strictly within the authorized work zone.
3. Subfloor Preparation and Installation: Repair and inspect the subfloor, then install the new flooring system.
4. Inspection and Reopening: Verify that all readiness criteria have been met before handing the area back over for clinical use.
Note: The above is provided as a general example; the actual plan should be determined by the hospital and the construction team based on specific circumstances.
4. Controlling Dust, Noise, Odors, and Infection Risks
Controlling Dust and Debris
Floor demolition generates significant amounts of fine particulate matter. Before any demolition work begins, comprehensive physical containment measures must be implemented: install sealed, rigid barriers; cover all openings with plastic sheeting; place adhesive dust-control mats at the exits of the work area; and establish a dedicated negative-pressure ventilation system (equipped with HEPA filters) to ensure that airflow moves from clean areas toward the construction zone—never the reverse.
Assessing Emissions from Adhesives and Materials
Adhesives, primers, and flooring materials may release volatile organic compounds (VOCs) and odors, which can affect patients, staff, and indoor air quality. Select low-emission products that meet the requirements for healthcare environments, and clearly define ventilation needs for the duration of the installation and curing process.
Selecting Flooring to Align with Renovation Phasing
Each flooring system carries specific installation constraints that influence how well it fits into a hospital’s phased renovation schedule:
Vinyl Sheet Flooring:
Favored for clinical areas due to its seamless, easy-to-clean surface. Installation requires thorough subfloor preparation, the application of adhesive, and heat-welding of the seams.
Modular or Tile-Based Systems:
These can offer faster installation in certain configurations and allow for localized replacement. When selecting these, evaluate their seam systems, subfloor requirements, edge-finishing methods, and their suitability for the specific foot traffic and hygiene standards of the intended medical area.
Questions to Consider When Selecting Hospital Vinyl Flooring:
Is the product suitable for the intended medical area?
What are the requirements regarding subfloor flatness, moisture content, and adhesives?
What are the manufacturer’s recommendations for installation and curing times?
What maintenance and cleaning procedures must be followed to preserve flooring performance and ensure the warranty remains valid?
Are the relevant technical data sheets, fire ratings, and test reports for healthcare environments available?
Estimating the Cost of Hospital Flooring Replacement
- Base products, seam treatment, and accessories.
- Labor for removal, debris transport, and compliant disposal (including testing for hazardous materials, if necessary).
- Subfloor leveling, moisture mitigation, patching, and surface preparation.
- Primers, adhesives, welding rods, and edge-finishing materials.
- Professional flooring installation teams with experience in healthcare environments.
- Installation of barriers, enclosures, negative-pressure air systems, and temporary access routes.
- Additional labor costs for work performed during non-standard hours.
- Final cleaning, project sign-off, and a 10%–15% contingency allowance for unforeseen site conditions.
There is no standard, universal cost per square foot (or square meter) for hospital flooring replacement. Final costs can vary significantly based on site conditions, project scope, scheduling constraints, and local labor rates. Be sure to request a detailed, itemized quote from an experienced contractor.