
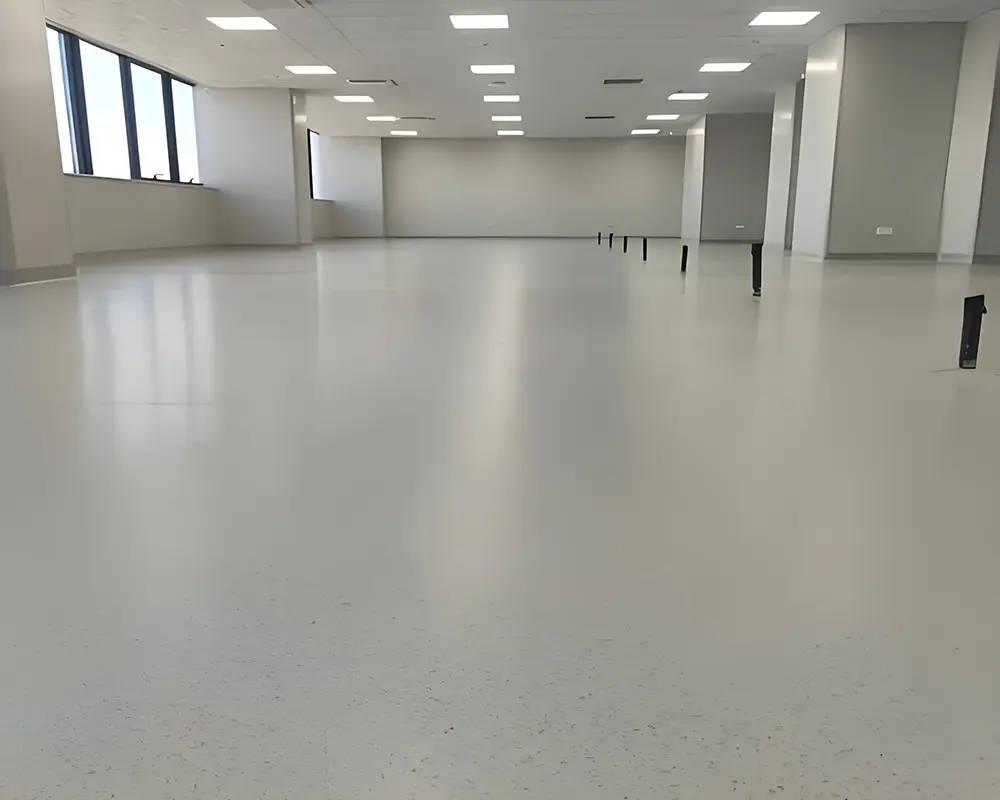
Commercial vinyl flooring isn’t just for commercial spaces; it encompasses hospitals, dance studios, offices, kindergartens, and many other areas. We collectively refer to it as commercial vinyl flooring, primarily to distinguish it from sports flooring. Although both use PVC vinyl, their structures and performance are completely different.
Commercial flooring can be divided into heterogeneous and homogeneous structures. While the structures differ, the installation process is the same, and minor differences are negligible. This guide, based on Dongxing Plastic’ years of experience producing commercial vinyl sheet floor products and user feedback and questions during installation, provides a professional and comprehensive installation guide.
1. Before Installation
1.1 Materials and Environment
Maintain a room temperature between 15-30°C (59-86°F) before, during, and for 48 hours after installation.
Maintain a relative humidity between 30-70%.
Unfold and lay the PVC commercial flooring flat in the installation area for 24-48 hours to relieve stress.
Ensure all other subfloor construction is complete to prevent damage to the new flooring.
2. Tools and Materials
| Category | Required Items |
|---|---|
| Measuring & Layout | Laser level, 3m straightedge, tape measure, chalk line, carpenter’s square |
| Cutting | Utility knife with heavy-duty blades, vinyl cutter, jigsaw (for irregular cuts), straightedge ruler |
| Adhesive Application | Notched trowel (1mm×1mm for 2mm flooring; 1.5mm×1.5mm for 3mm flooring), adhesive spreader |
| Installation | 50kg floor roller, rubber mallet, tapping block, pull bar, spacers |
| Seam Welding | Hot air welder (350-400°C), groover, floor scraper, trimming knife |
| Subfloor Prep | Moisture meter, industrial vacuum, leveling compound, patching compound, belt sander |
| Finishing | Transition strips, baseboards, quarter-round molding, neutral cleaner |
3. Subfloor Requirements
The subfloor must be clean, dry, level, and structurally stable.
Maximum deviation ≤2 mm per 2 meters.
Moisture content: Concrete subfloor ≤3%.
Remove all dust, oil stains, and other residues.
Repair cracks and eliminate gaps.
4. Installation Steps
4.1 Layout and Marking
Measure the room dimensions and divide the room into four quadrants.
Dry-lay the vinyl flooring along the marked lines and check the layout.
Adjust the starting line to ensure the edge strip width is not less than 5 cm.
4.2 Cutting
Fully stretch the vinyl flooring.
Cut to the required size, leaving a 5-10 cm overhang on all walls.
For irregular shapes, perform a pressure cut.
For multiple sheets, ensure perfect pattern alignment and tight seams (gap ≤0.3 mm).
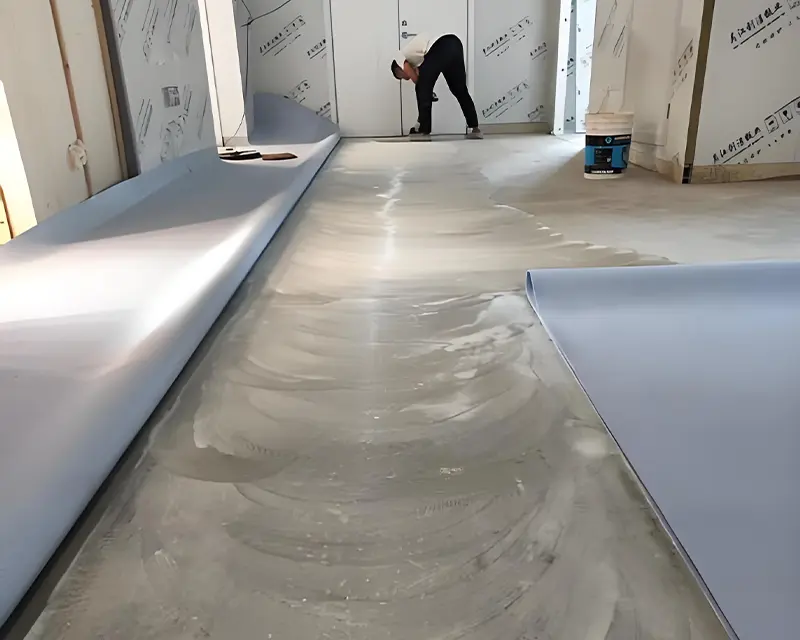
4.3 Apply Adhesive and Lay
Fold one half of a single roll of vinyl flooring backward. Apply the recommended water-based PVC adhesive.
Wait until the adhesive becomes slightly tacky before laying the vinyl (usually 10-20 minutes).
Carefully place the vinyl material back into the adhesive, laying it from the center outwards.
Repeat the above steps for the other half.
Using a 50 kg floor roller, press the vinyl material firmly from the center outwards to remove air bubbles.
Use a 20 kg hand roller to repeatedly roll the seam area to ensure a strong bond.
Important Recommendation: For homogeneous vinyl flooring, full application of adhesive is essential. For heterogeneous vinyl flooring, perimeter bonding may be feasible in low-traffic office areas, but full application is still recommended for durability.
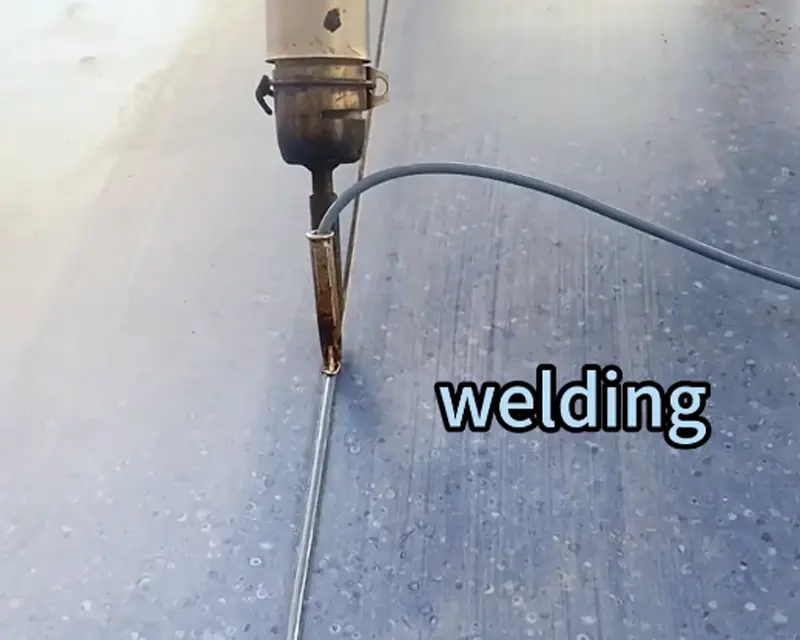
5. Welding Seams
Welding creates a waterproof, hygienic, and seamless surface, preventing dirt, bacteria, and moisture penetration. Heat welding is mandatory in high-risk areas such as hospitals and operating rooms.
Before welding, ensure the adhesive is fully cured (at least 24 hours).
Cut a V-groove along the entire length of the joint using a professional grooving machine.
Groove depth = 2/3 of the floor thickness (1.3 mm for 2 mm flooring, 2 mm for 3 mm flooring).
Thoroughly vacuum to remove all dust and debris from the groove.
Insert a PVC welding wire of the same color and material into the hot air welding machine.
Set the welding machine temperature to 350-400°C and move the welding rod along the joint at a steady speed of 0.5-1 m/min.
Apply even pressure, ensuring the welding rod completely melts and fills the groove.
Allow the weld to cool for 10-15 minutes.
Use a floor scraper to smooth out any excess welding rod, making it flush with the floor surface.
Hospitals should use antibacterial welding rods to maintain hygiene standards.
6. Walls and Floors
A wall-to-floor transition allows for a seamless connection between the walls and floors, avoiding hard-to-clean corners. Hospitals vinyl flooring, laboratories, and cleanrooms must install wall-to-floor transitions; installation is also recommended for kindergartens and food processing areas.
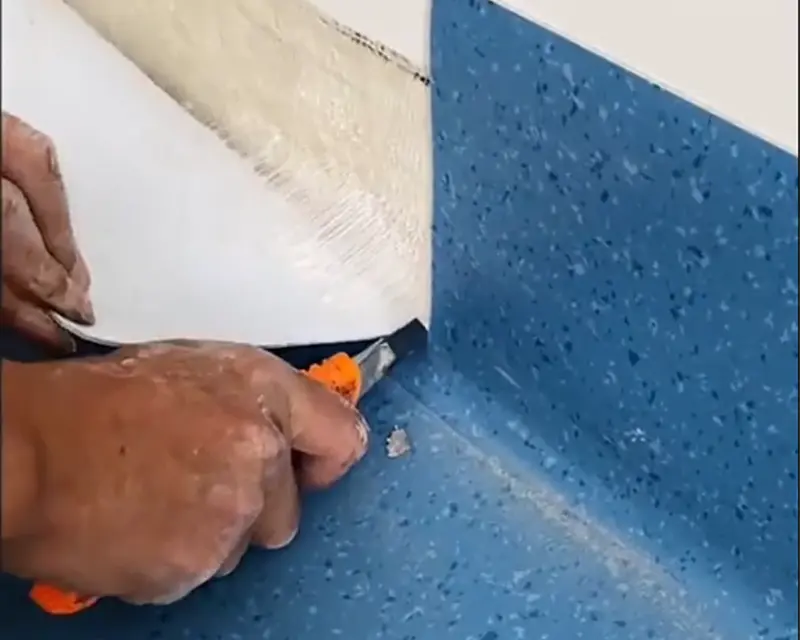
Cut the vinyl material to extend upwards by 10-15 cm.
Install the curved strip along the bottom of the wall.
Heat the vinyl material with a heat gun to soften it.
Pressure the vinyl material firmly into the curved strip to form a smooth curve.
Trim off any excess vinyl material at the top of the curved strip.
Weld the vertical seam where the curved strip meets the main flooring.
7. Finishing Touches
Trim off any excess vinyl material around walls and barriers.
Install transition strips at doorways and where the vinyl material meets other flooring materials.
Install baseboards or quarter-circle trim to cover expansion joints.
Leave a 5-8 mm gap between the vinyl material and the wall to accommodate thermal expansion and contraction.
Clean the entire floor using a neutral pH cleaner and a damp mop.
The floor is ready for use after 48 hours of curing.
We can provide relevant installation guides and videos. Correct installation steps can prevent problems such as bulging and warping in pvc vinyl flooring. As a manufacturing plant, we can customize designs to your needs and provide quotes from the source factory. We welcome you to request free samples.