
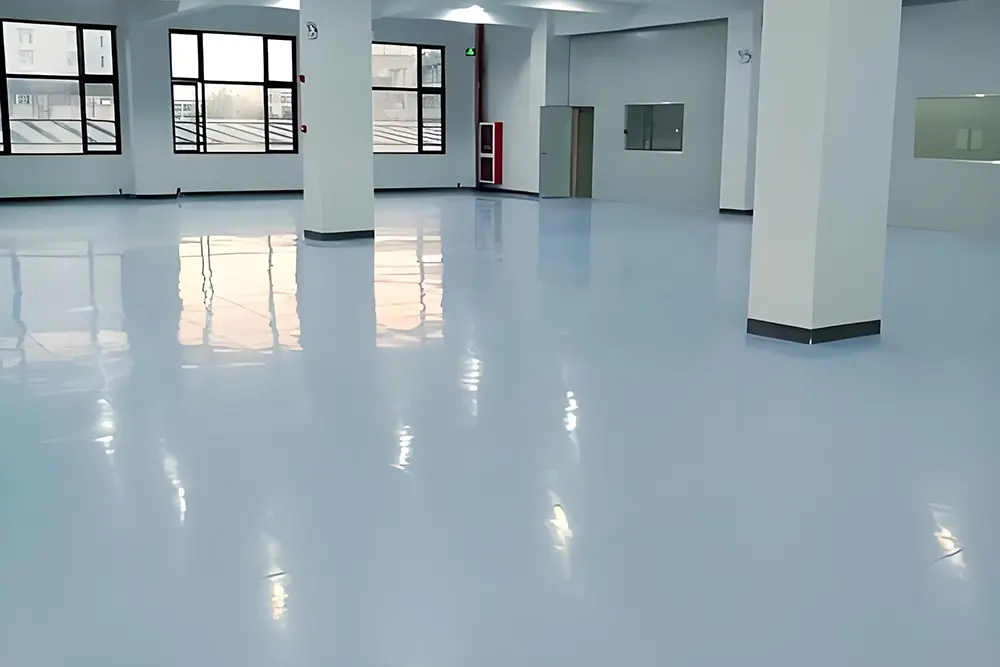
Anti-static vinyl flooring, also known as ESD flooring, is a core flooring material used in industrial spaces such as electronics manufacturing workshops, clean rooms, data centers, laboratories, and hospital operating rooms. If you choose our anti-static vinyl flooring but are unsure how to install it correctly and effectively, this guide will provide the most complete operating steps to assist with the construction.
1. Subfloor Preparation
Use a 2-meter straightedge to check that the floor height difference is ≤2mm, and there are no bumps, laitance, cracks, or pits;
The moisture content of the subfloor concrete should be ≤3% to prevent moisture penetration that could cause the flooring to bulge and delaminate later;
The concrete strength should be ≥C20, without sand or delamination, and the surface tensile strength should be ≥1.5MPa;
The floor should be clean, free of oil, paint, and insulating impurities.
2. Preparation of Supporting Tools
- Special conductive primer, conductive adhesive
- 6-10mm wide conductive copper foil
- Antistatic PVC welding wire
- Antistatic cleaner
- Special antistatic wax
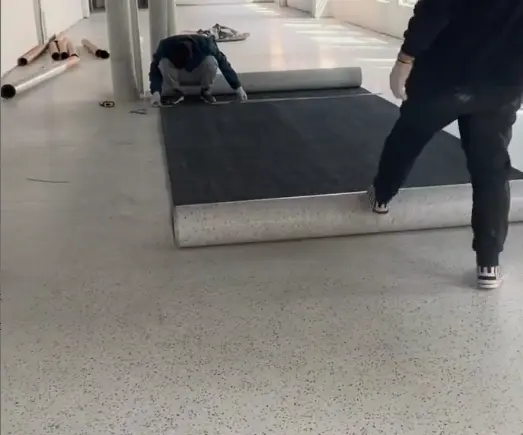
3. Pre-laying of ESD Vinyl Flooring
Vinyl flooring needs to arrive at the construction site 24 hours in advance. Rolls should be unrolled and laid flat, sheets should be unpacked and laid flat to fully adapt to the site temperature and humidity, eliminating internal stress generated during production and transportation.
4. Construction Steps
4.1 Base Coating
After the base layer treatment is completed, apply the conductive primer.
Use a cross-hatching method to evenly apply the special conductive primer. Apply the first coat horizontally, then the second coat vertically, ensuring no missed areas and no adhesive buildup. This forms a grid pattern, which will also be the grid positions for the next step of laying the copper foil.
After application, allow it to stand for 4-8 hours until the primer is completely dry and forms a homogeneous conductive film.
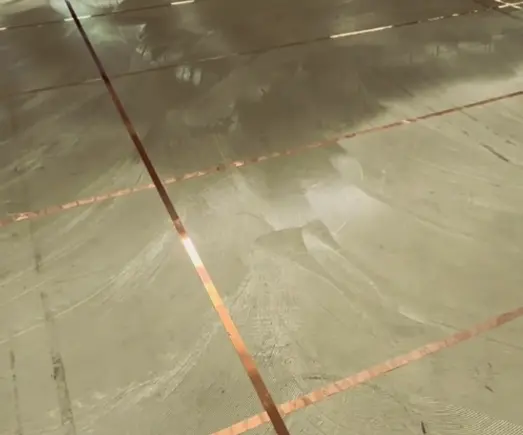
4.2 Copper Foil Fixing and Grounding
Conductive copper foil is laid in a grid pattern. The standard grid spacing is 6m x 6m, but in highly electrostatic-sensitive areas, it needs to be increased to 3m x 3m.
The copper foil must be laid straight, without bends or breaks.
The copper foil grid must be reliably connected to the building’s lightning protection grounding system and the dedicated grounding electrode for the computer room. At least two independent grounding points should be set up for every 100㎡ of construction area, with a grounding resistance ≤1Ω.
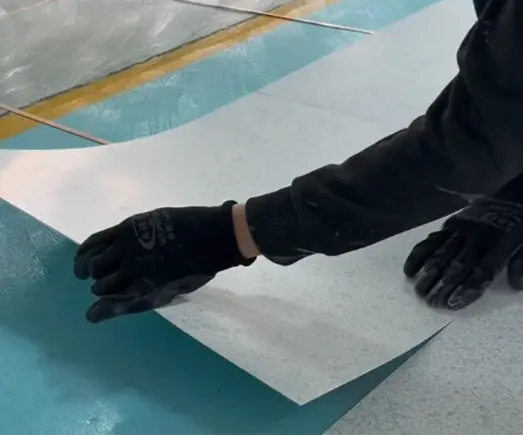
4.3 ESD Flooring Roll and Sheet Installation
Apply adhesive to the bottom and wait until the adhesive is touch-dry (usually 15-30 minutes, not sticky or stringy) before laying the flooring. Lay it synchronously from the center line of the room outwards, aligning the seams of rolls and the cross seams of sheets.
After installation, use a 50kg heavy-duty roller to roll the floorboards evenly from the center outwards, thoroughly removing air from between the floorboards and the adhesive layer. This ensures 100% adhesion between the floorboards and the adhesive, with no hollow spots or air bubbles. Use a smaller roller for secondary compaction at corners and doorways.
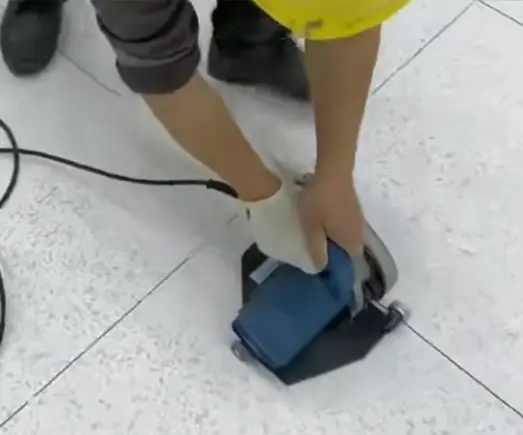
4.4 Joint Grooving
Grooving prepares for heat welding, creating straight grooves of consistent depth to ensure a tight seal and continuous conductivity after welding.
A dedicated electric grooving machine ensures straight, consistent depth, and burr-free grooves compared to manual grooving.
The grooving depth should be 2/3 of the floorboard thickness, depending on the thickness of your antistatic flooring.
Precise V-grooving is required at the cross joints of sheet materials to prevent incomplete welds.
4.5 Welding
The welding wire must be a dedicated antistatic PVC welding wire that matches the flooring substrate and has compatible conductivity.
A specialized hot air welding torch is used, with the temperature precisely controlled between 180-220℃ and a moderate airflow. During welding, the torch is held at a 45° angle to the weld seam and moved at a uniform speed of 3-5 m/min to ensure complete melting and even filling of the groove.
4.6 Weld Smoothing
While the weld seam is still warm, a specialized scraper with a guide plate is used to scrape away the upper half of the weld seam.
After the weld seam has completely cooled to room temperature, the scraper with the guide plate is used again to completely smooth away the remaining weld seam.
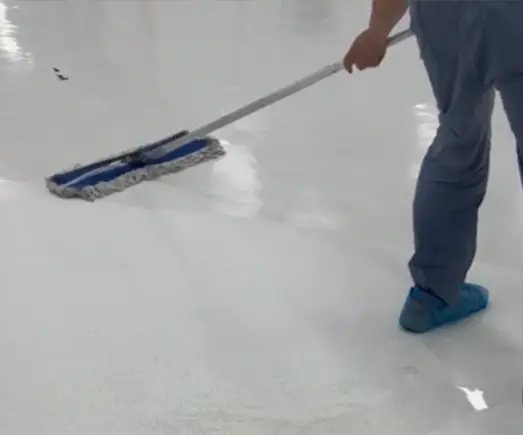
4.7 Antistatic Wax
Thoroughly clean the floor surface with a neutral antistatic cleaner, removing all dust, stains, adhesive residue, and welding remnants. Only apply the wax after the floor is completely dry.
Use only a dedicated antistatic wax; do not use ordinary floor wax, as it will form an insulating layer, completely negating the antistatic properties of the floor.
Apply 2-3 coats in typical scenarios. The wax needs 24 hours to dry completely; during this time, pedestrians are strictly prohibited from walking on it. Within 72 hours, avoid placing heavy objects on the floor, bringing in equipment, or allowing sharp objects to scratch it.
5. Summary
The above installation steps ensure the antistatic function and normal use of the floor. Every detail and precaution should be considered. Ordinary or inferior flooring materials and tools are not suitable. For information on selecting the thickness and model of antistatic flooring, please refer to our industrial vinyl flooring product catalog or consult us.